Friday, December 2, 2016
Watercolor Cards
I miss painting!
I miss when I had instructors telling me to draw 5 things every day and turn in my sketchbook at the end of each week. Prompts focus my creativity and when art is "work" it makes focusing on homework a whole lot easier. Not to mention all that work made me really good.
Now I have no time or any excuse making me work on artistic endeavors, so keeping up the practice in any little burst always makes me feel better.
Small sketches matched with washi tape make great simple cards. I get to practice some simple images and actually have some way of using them!
Labels:
arts and crafts,
cardmaking,
cards,
crafting,
crafts,
diy,
etsy,
handmade,
ideas,
paper,
scrapbooking,
stationary,
washi tape
Friday, September 30, 2016
Leather Kindle Cover
 |
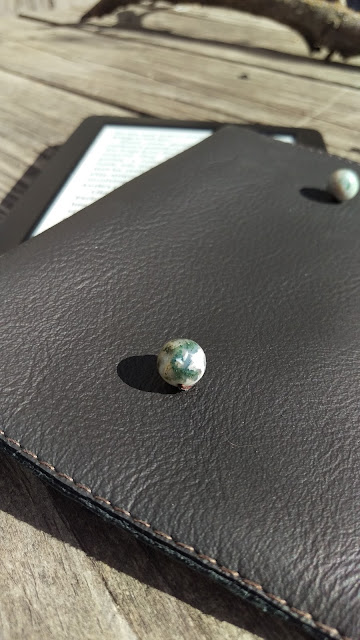
Something outside of paper today, a case for my kindle! |
Price breakdown: (technically free because all things were purchased for a different project, but here goes anyway)
- $5.40 leather*
- $1.50 elastic chord*
- the thread was actually free, it's been a fixture in my mom's sewing stuff for years
- $4.99 string of beads
*The elastic chord was on sale from $3, and I used a hobby lobby 40% coupon for the $9 leather.
= $11.89 (it's worth mentioning I think this is the 4th thing I've made out of all these items)
I made a paper rectangle the size of my kindle (4 5/8" x 6 5/8") and used that to cut out the leather. That being said, it's a very tight squeeze and even though I left some wiggle room it was not quite enough. I used a heat gun and warmed it up to stretch it a little and that helped a lot.
I trimmed the leather to 7 1/2" x 12 1/2", I folded the short side over the paper rectangle and stitched the two lines about 7" apart. Next time they would be about 7 1/4" apart. I hand sewed the elastic and the beads (and extra reinforcement on the top of the machine stitches. I waited until I was finished sewing to trim down the sides. That's how to get stitches so close to the edge on leather very easily.
Saturday, September 24, 2016
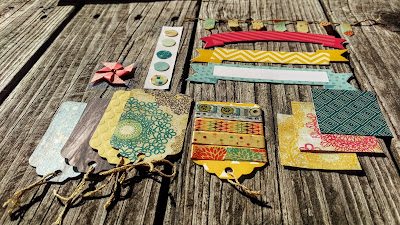
Cardmaking kits
So school has just started up again and I'm back to very little free time again! But as usual, I'd rather put off cleaning my house for some unwinding in the crafting department. Stress relief come in many flavors and since wine at 11 am is socially unacceptable, I do arts and crafts!
I am going to be doing a big move in a year or so and my lovely fiance pointed out that I have a lot of "craft crap". I downsized a while ago but it just turned into an excuse to buy newer and better stuff. And while I told him to mind his business and worry about downsizing his own stuff, I unfortunately realized he's right. So the solution is kits!
Have you ever bought a pack of absolutely BEAUTIFUL card stock on sale and realized that while you love every page (or don't, in some cases) you just don't need repeats of each page that seem to make the whole stack weight about 3 lbs.
I also usually work small. Mini books, traveler's notebooks, cards, etc. So a full 12x12 scrapbook page goes a long way for me. So for gifts for my crafty friends (and etsy, working on getting that set up. It's coming soon!) I decided scrapbooking/card kits are the way to go!
 |
| Project ideas and examples for what's included in the kit. |
It also really clears up my scrap pile. As any crafty person knows even the tiniest shape of paper can be used for something, it's part of being a hoarder creative. Cutting them into little squares and finally saying goodbye is the first step to recovery. And by recovery I of course mean clearing space for new hobby lobby sale finds.
 |
| Texture is probably my favorite thing in the world. If I find a print with shiny/embossed/metallic aspects I want it! |
 |
| Woodland set |
 |
| Black and White set |
Labels:
arts and crafts,
cardmaking,
cards,
crafting,
crafts,
easy,
etsy,
handmade,
ideas,
paper,
paper crafts,
planner,
project,
scrapbooking,
snailmail,
stationary,
washi tape
Tuesday, August 2, 2016
Friday, November 20, 2015
Christmas Cards -continued
More uses for the tag punch with simple embellishments. (Also- I love that script stamps exist, it seems that whenever I try really hard to write something nice and pretty and permanent, it looks like a cross between a doctor's signature and a toddler's left hand.)
Monday, November 16, 2015
Christmas cards!
I wanted to try and move away a little bit from the over-embellished. I love my craft supplies, I really do. In fact every trip to Hobby Lobby for one thing ends up a pile in my shopping bag because apparently everything I ever wanted was on sale.
But just because I have a lot of stickers doesn’t necessarily mean it all has to look like I spilled glue on my page and rolled it around in the sticker/cutout drawer, which in my supply is the craft-herpes drawer. Those little buggers work their way onto EVERYTHING. *Sigh* I digress- Basic and rustic Christmas cards!
(And a tag to go along with!)
The star players;
- One stamp! One! (Which is becoming my favorite thing for the season)
- One brown paper card
- One brown paper rectangle, cut slightly smaller than the card
- Green embossing powder (and embossing ink pen)
- Chalks
- Not pictured; Tag punch, and little foam stickers to raise the page. I guess I lied, I did use stickers.
I find that when using a large stamp for its borders it’s a lot easier to line it up while it’s flipped over and press with my fingers.
The chalk was an afterthought, it just helped add texture and dimension to the plain paper and enhance the 3D effect of the cutout.
 |
| This one used even less stuff, all pictured here. |
ne used even less stuff, all pictured here.
Wednesday, November 11, 2015
Beginning.
I’m not interesting. Well, I am interesting. Depending on who you talk to I can be described as both funny, weird and funny, ha-ha. Regardless I have never considered myself interesting enough to have a blog and use that as a platform to thrust my every thought and opinion into the abyss of the internet.
And frankly I still won’t. I’d like to keep up my own momentum to keep making art like I used to, in every form. So I plan on putting together an arsenal of art inspiration for myself, and possibly inspire equally craftiness from others.
Expect to see arts and craft projects, artist techniques and ideas, and simple projects.
Subscribe to:
Comments (Atom)


